


Wassup guys, hope all of you are doing well..
So in this blog we are gonna discuss about Google authentication with Node.jS
It is really very easier then you think it is.
So follow along with me to create a sign in with Google using NodeJS.
create a folder with whatever your project / application name is
here I am calling it as googleauth.
Inside the project directory initialize you package.json by using the following command.
npm init -y
-y flag is used to quickly create it without mentioning details in it.
//for npm
npm install express passport passport-google-oauth20 mongoose cookie-session cors

//for yarn
yarn add express passport passport-google-oauth20 mongoose cookie-session cors
Install this dependencies in your project directory and create a file called index.js
//index.js

//declaration of packages
const express = require('express');
const mongoose = require('mongoose');
const passport = require('passport');
const session = require('express-session');
const cors = require('cors');

// initializing app
const app = express();

//Our app is gonna run on port 3001
const PORT = 3001;
app.listen(PORT, () => console.log("App is running"));
So we have made a basic structure of our application now let's connect the database to it . currently we are going to use mongoose db
create a directory called database and create a file named db.js inside it.
const mongoose = require("mongoose");
const URI = "<YOUR DB URL>"

exports.connection = () => {
    mongoose.connect(URI, {
        useNewUrlParser: true,
        useUnifiedTopology: true
    })
        .then(() => console.log("DB connected"));
        .catch(e => console.log(e));
}
Replace <YOUR DB URL> with your own connection uri.
Now we have to use this database connection method inside the index.js
//inside the index.js
const db = require('./database/db');
db.connection()
Let's create the schema for the database where we will define which data we have to store in database
so for that process let's create directory called models and file inside it called User.js
//inside the User.js

const { Schema, model } = require('mongoose')

const userSchema = new Schema({
    name: String,
    googleid: String,
    email: String
})

module.exports = new model('google', userSchema)
Now let's move towards the Google authentication part but before going further we must have to register our application with Google. If you have not already done so, a new project can be created in the Google Developers Console. Your application will be issued a client ID and client secret.
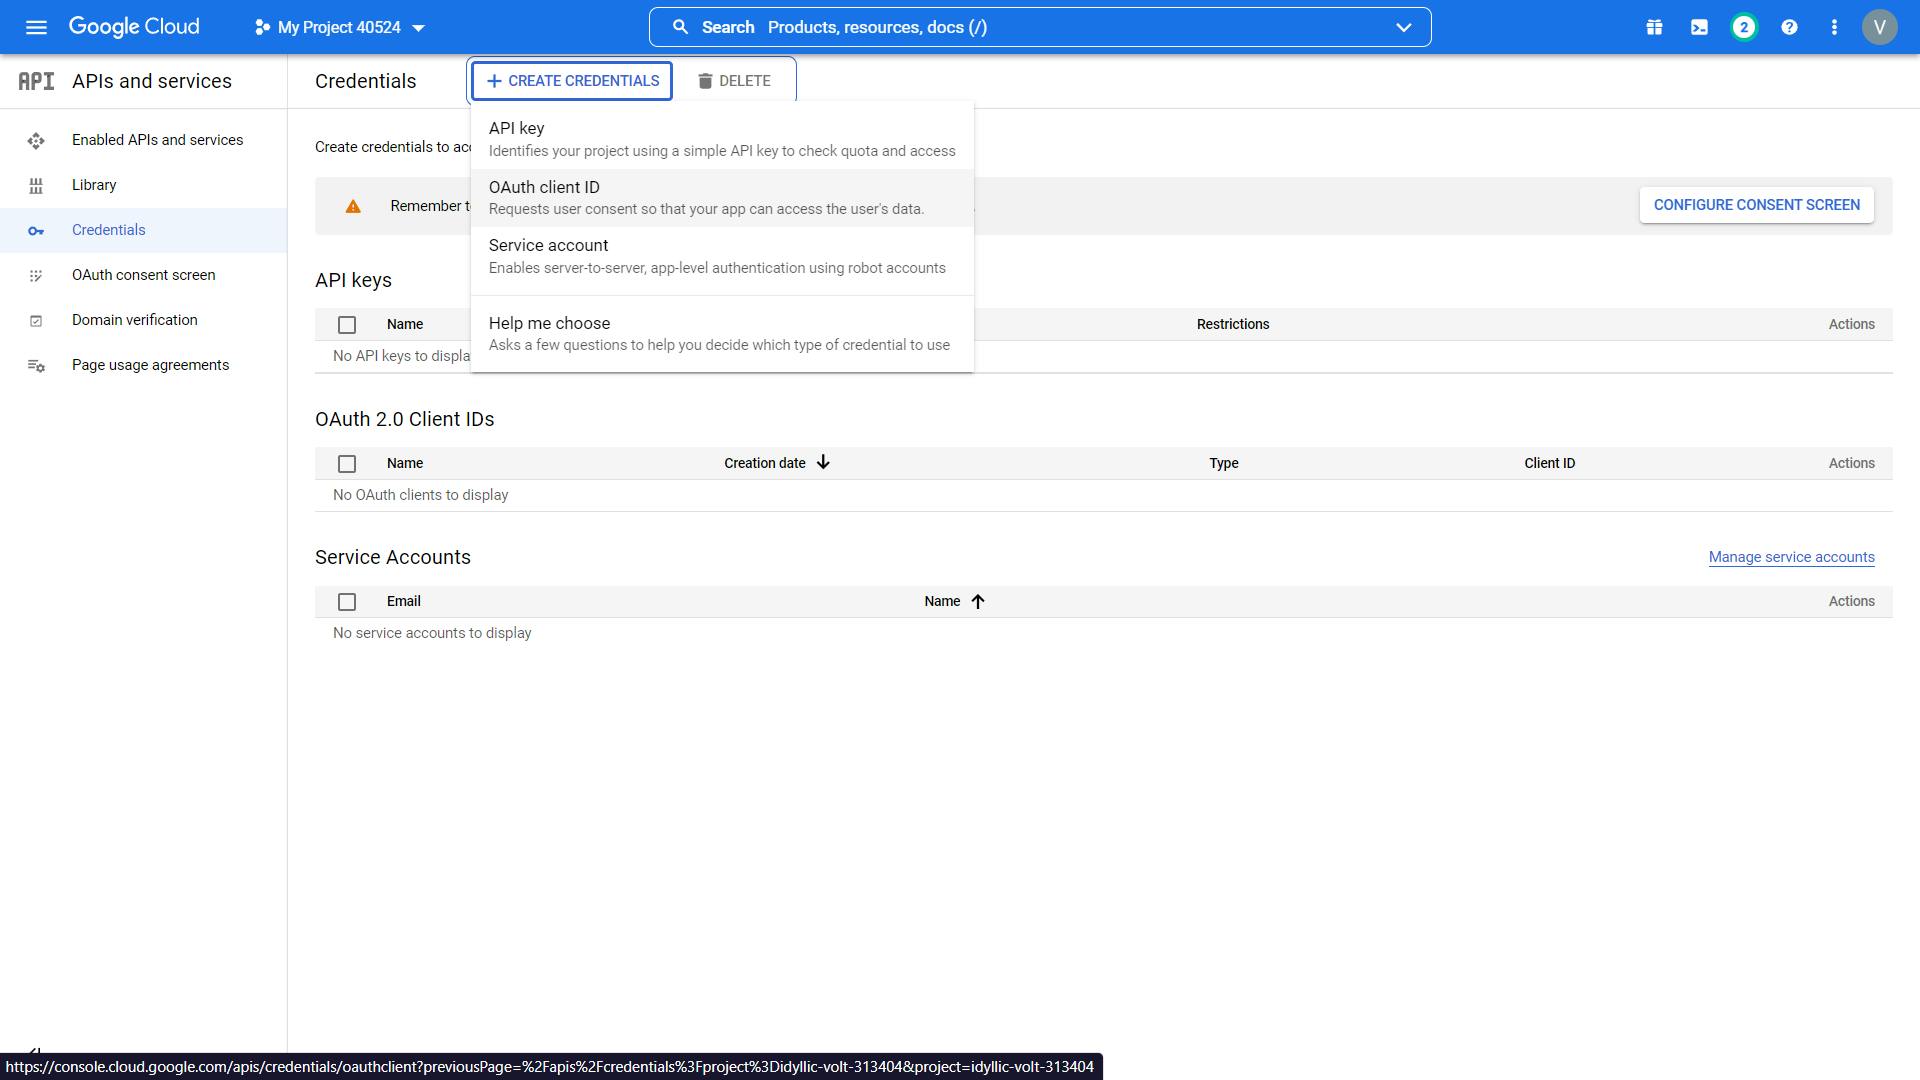
Hope you got your GOOGLE_CLIENT_ID and GOOGLE_CLIENT_SECRET successfully!
Now let's create new directory which is utils and create a a file called passport.js where we are gonna create our google sign in method.
//inside passport.js
const passport = require('passport')
const User = require('../models/user')
const GoogleStrategy = require('passport-google-oauth20').Strategy

passport.serializeUser((user, done) => {
    done(null, user.id)
});

passport.deserializeUser((id, done) => {
    User.findById(id, (err, user) => {
        done(err, user)
    })
})

passport.use(new GoogleStrategy({
    clientID: '<YOUR GOOGLE ID>',
    clientSecret: '<YOUR GOOGLE SECRET>',
    callbackURL: 'http://localhost:3001/google/callback'
},
    (accessToken, refreshToken, profile, next) => {
        User.findOne({ email: profile._json.email })
            .then(user => {
                if (user) {
//if user was already stored in db then we simply pass next function
                    next(null, user)
      /*here you can store user_id or whatever you like
      in the cookie but we are skipping it for now*/
                } else {
                    User.create({
                        name: profile.displayName,
                        googleid: profile.id,
                        email: profile._json.email,
                    })
                        .then(user => {
                            next(null, user)
                            //cookie token
                        })
                        .catch(e => console.log(e))
                }
            })
    }
)
)
Now let's come back to the index.js and initialize the passport to be able to use it and define some routes where we can see signup panel.
//inside the index.js

app.use(passport.initialize())
app.use(cors())
app.use(passport.session())

app.get('/logout', (req, res) => {
    req.logout('logout')
    res.redirect('/login')
})

app.get('/google', passport.authenticate('google', {
    scope: ['profile', 'email']
}), (req, res) => {
    res.send('login')
    console.log(req.user);
})

app.get('/google/callback', passport.authenticate('google'), (req, res) => {
    res.send('login')
})
So finally it's done, run node index.js in your command prompt and visit http://localhost:3001/google to see the google signin
Thank you so much for reading my blog